
CROSS-HATCHING EXERCISES
When shading a drawing subject with cross-hatching, turn your paper around in various directions as you go, so that you are always using your natural hand movement. You can also try holding your arm in different positions as you draw. Whatever you find to be the most comfortable is usually better for you.
The shading of a cast shadow (on the surface on which an object is sitting) is darker and closer to the object and becomes gradually lighter as it moves outward.
EXERCISE 1) Draw the outline of one side of the room (any room) and shade it with a variety of lines, crossing, vertically /diagonally /horizontally.(use a ruler if you want). Use your A4 drawing pad. (use a viewfinder if you like, to isolate the area you are drawing).
Try to get a range of light, medium and dark tones with different lines. This is just to practice hatching in an actual drawing, using lines in different directions and in layers to create tone.
EXERCISE 2) –Copy this drawing in your A4 drawing pad, in a larger rectangle of the same proportions (practice enlarging as well)
This is a quick drawing of a baby elephant by the legendary Rembrandt.
See how he has used varying types of hatching to build up the form and texture of the little elephant.
Try to divide the image (& your rectangle) into 4 quarters and then draw the negative spaces around the elephant first. Forget you are drawing an elephant, turn it upside down to help with this right-brain exercise.
Next, turn it up again the right way, refine any parts you need to and then follow on to draw the hatched wrinkling and shading
Follow along the sections of the Foundation Drawing Module index, by clicking on each image in the grid
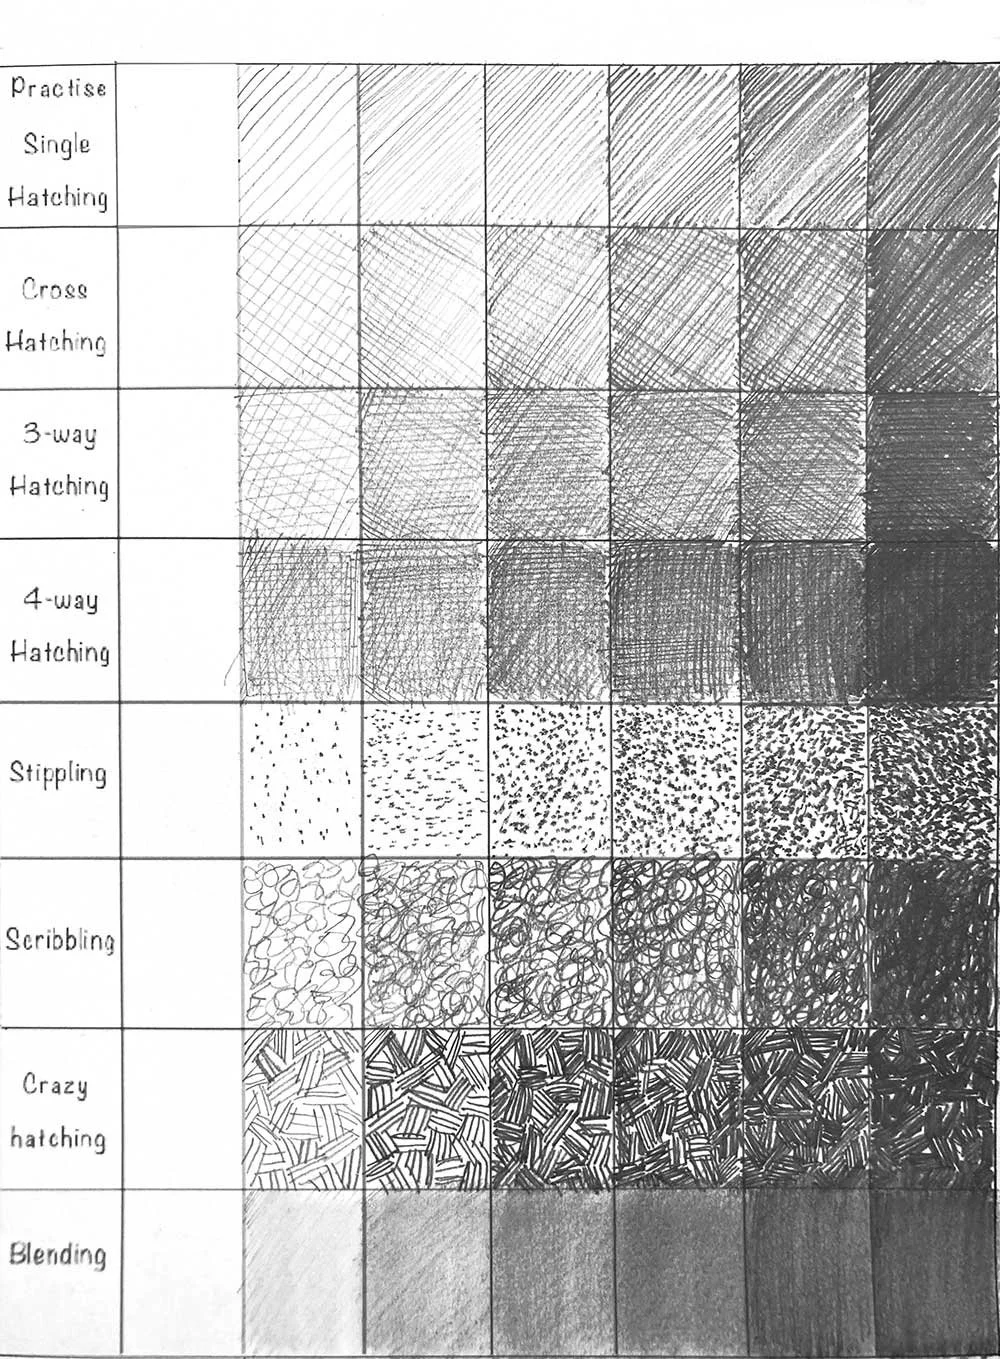
Hatching and Blending Practise

Elements of Drawing

Contour Drawing

Value Drawing

Drawing Shadows

Gesture Drawing

Human Proportions

Improving visual perception

Introduction to Drawing animals

Cross-hatching exercises

Introduction to Drawing People

Drawing the landscape