

CONTOUR DRAWING
HERE WE CONNECT THE EYE, THE RIGHT BRAIN & THE HAND
(THIS EXERCISE IS CALLED CONTOUR DRAWING) (don't worry that your result is not realistic, no one expects it to be for months or years, but it is serving the purpose of 'connecting' your eyes and hand (and stopping your big old brain from telling you to draw what it think it sees, not what is actually there). The more times you do this the better the connection becomes.) Keep every page so you can look back over the gradual progress.
CONTOUR DRAWING EXERCISE 1. Draw the outline (edges) of a simple object eg. scissors, vase, or shoe. DON’T LOOK AT YOUR PAPER…..Keep your eyes on the object, keep the pencil on the page, find a starting point to draw the edges of the object and keep drawing without lifting up the pencil. get focused with your brain and eye on the subject.
Only look at your contour drawing at the end. You can laugh if you like (most of us did when we saw our first contour drawing result) Keep it to compare and do it again each day or more. You will see a gradual improvement in the likeness over time. Remember, it is working to connect the eyes, brain and hand even if the results are funny.
These two examples show hand positions, students use recycled paper(above), butcher's paper and photocopy paper, this is not a technique for your best paper or even you usual sketch pad. You want to use any old paper so you will just keep doing contour drawing profusely with no attachment to how it looks (although if you save them you will certainly see the progress later on)
CONTOUR EXERCISE 2.a) Draw a contour (outline) of your hand without looking at paper
b) Draw the contour of a pair of scissors
c) Draw the contour of a friend without looking at paper (on another page)
d) Draw the contour of a chair without looking at paper (on another page)
Follow along the sections of the Foundation Drawing Module index, by clicking on each image in the grid
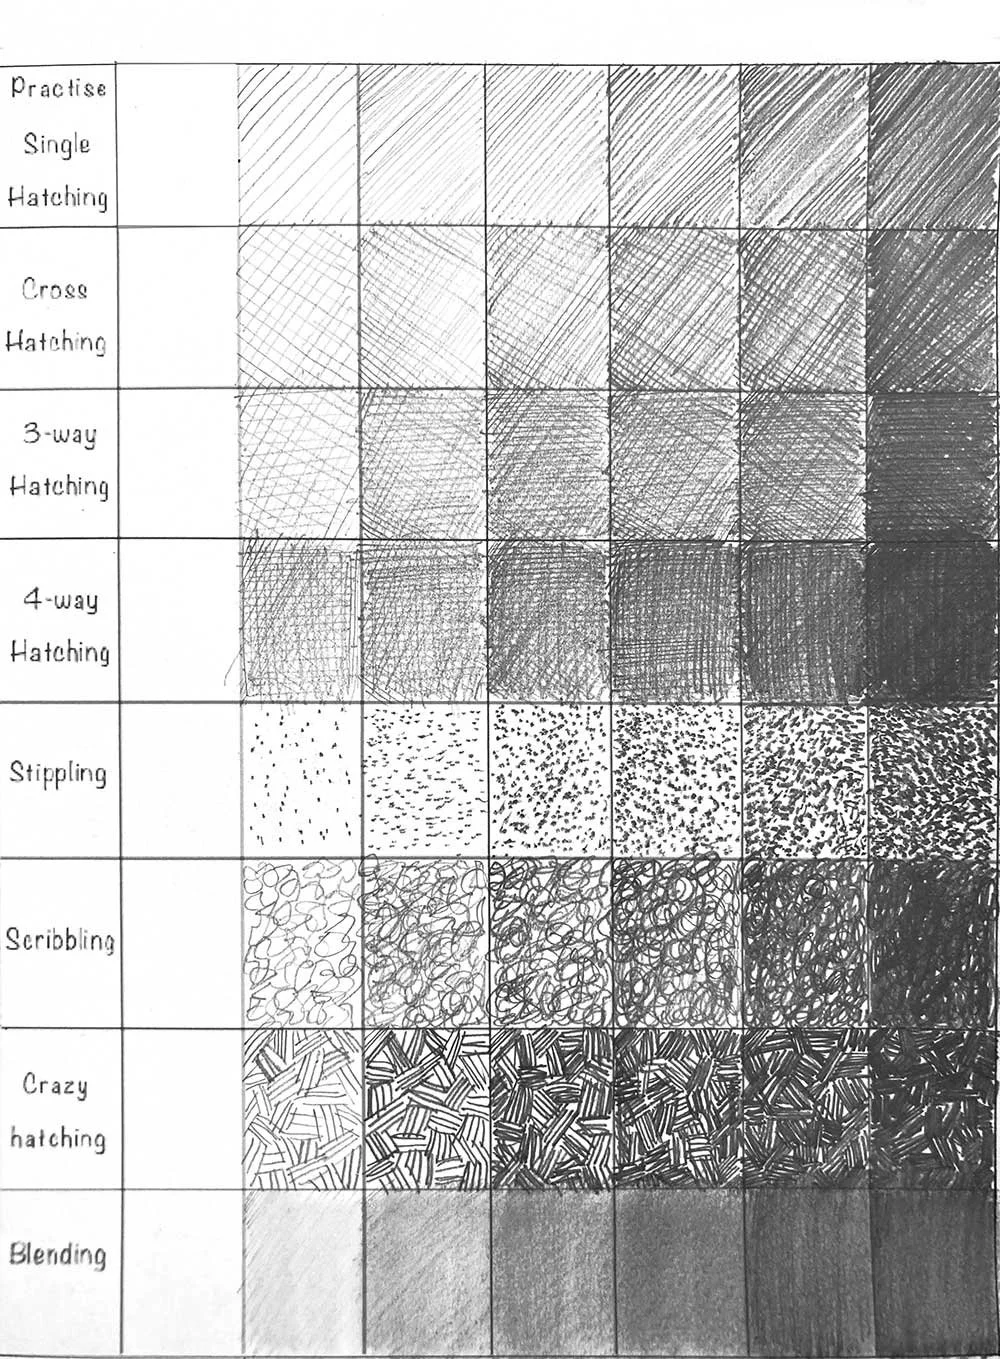
Hatching and Blending Practise

Elements of Drawing

Contour Drawing

Value Drawing

Drawing Shadows

Gesture Drawing

Human Proportions

Improving visual perception

Introduction to Drawing animals

Cross-hatching exercises

Introduction to Drawing People

Drawing the landscape